Wednesday, June 26, 2013

Herbal home remedies that we put to use this week!

  These last 3 days have put some of my herbal home remedies to the test!  It's never fun to be injured or sick, but I would much rather have some handy treatments than have to run to the doctor.  

  So, earlier my husband had what appeared to be pink eye.  I made a compress of chamomile flower and burdock root, had him apply it every few minutes for about 2 hours, and the next day it was almost gone.  That evening he did compresses again, and his eyes were totally clear the next day!


  Yesterday morning, I burned my hand pretty badly, and immediately put my hand under cool running water for about 20 minutes.  Then I cut a stem from my aloe plant, and rubbed it on.  The pain was still really bad, so I went to the wonder-all of my essential oils...lavender.  Lavender is analgesic as well as antibacterial, so I applied several drops neat.  Within a few minutes, the pain had subsided.  Remarkably today, there is much improvement!

  Last night for dinner, I tried a couple of bites of ham, literally 2 bites.  Well, there was some hidden gluten in it because I felt horrible within 20 minutes.  This morning was one of those terrible gluten "flu like" days.  Before bed and all day today, I double my usual dose of dandelion tincture, and multi-vitamin tincture.  I also drank lots of warm lemon water, apple cider vinegar, and fresh fruits.  Now I am feeling more normal.  You know if you've been glutened it takes a while to get it out of your system, but hopefully this will be done by tomorrow.

  My sister-in-law said she has bad poison ivy, so I made several things for her to try.  For the itching, a spray of witch hazel, lavender, chamomile, geranium.  Also an infusion of chamomile flowers and burdock root, and a wash of peppermint and eucalyptus.  I will let you know how she likes any of these.

  Here's my page on making the tinctures


What herbal home remedies have you been successful with, I'd love to hear about them :)


Monday, June 24, 2013

Natural toothpaste and mouthwash

  Whenever we would spend summers with Papa and Granny in the NC mountains, they would always try to get us to use natural ways to brush our teeth.  We would chew on a branch from a black gum tree, as Granny said she had done as a child in the 1920-30's.  I always thought that the toothpaste wasn't good, especially because I was using a bubblegum/minty store bought one.  But I learned to appreciate the simple and pure ingredients as I became an adult.  Granny always put a cinnamon stick in a jar of baking soda.  I adapted that a little bit, and here is the easy alternative.  Enjoy!

  •   a sanitized glass jar (I used the empty, blue glass jar that probiotics come in)
  • fill it half full with baking soda
  • add 2-3 drops of cinnamon essential oil along with 1 stick of cinnamon
  • add 1-2 drops of clove essential oil
  • shake to mix well
  • dip your dry  toothbrush in it and brush
 For the mouthwash, it is just as easy. Grandmama always insisted on mouthwash and used Listerine twice a day.  She always had great teeth!  I prefer the taste of this one that I love to make.


  • sanitized glass jar (I use an empty, clear glass jar that spices come it)
  • fill the jar 3/4 full of distilled water
  • add 2-3 drops of tea tree oil
  • add 2-3 drops peppermint essential oil
  • add 1-2 drops lavender essential oil
  • shake jar to mix and use a mouthful to rinse and gargle after brushing
Your mouth will feel so clean and fresh, and all of these oils have antibacterial qualities too.  I use a store bought toothpaste with fluoride, either Tom's of Maine, or Burt's Bees, a few times a week.  I do this because we have un- fluoridated well water, and I have never made a paste with re-mineralizing components.  You can however make one if you wish, WellnessMama has a good recipe that adds these  ingredients.

Sometimes when we are younger, we don't want to listen to the wisdom of our elders.  It may have taken me a while to appreciate it, but thanks goes to my Southern Grandparents for planting the seeds that would eventually grow!

Thursday, June 20, 2013

Gluten free, dairy free giant chocolate chip cookie

  You know those giant chocolate chip cookies that they sell in the bakeries?  My kids always like to get those for birthdays.  Before being gluten free, I made a few of these at home.  I have experimented three times with making it gluten free, and was pretty happy with this last attempt (although I wish it had turned out prettier).
  Here is my current recipe, I will probably try tweaking it another time or two, and if it's an improvement, I'll let ya know!


I love that we have local honey in the pantry


  1. 2 cups of almond flour
  2. 1/2 cup coconut flour
  3. 1/2 tsp kosher salt
  4. 1 tsp baking soda
  5. 1/4 cup organic, natural applesauce
  6. 3/4 cup chocolate chips
  7. 2 eggs, beaten
  8. 1/4 cup honey
  9. 1/4 cup chopped pecans
  10. 1/4 cup chopped walnuts
  •   Preheat oven to 350.  
  • Mix all dry ingredients in a bowl
  • Mix all wet ingredients into a separate bowl
  • drop onto parchment, or a Silpat, and spread into a giant circle

   Of course I always have to eat some raw!  I know, I know raw egg isn't good for me!


  Bake for 8-12 minutes until edges start to brown.  Let cool and cut into pie/pizza wedges.  I think I cut before it was cool enough, so it isn't as pretty as I'd like.  It freezes really well too.
It is great with a little fruit on the side, and I'll bet it would be great with ice cream!
  Let me know if you give it a try, or let me know if you have your own way of making giant cookies!  Enjoy!

Wednesday, June 19, 2013

Homemade, all natural body and facial scrub

  Have you ever wished that you had the time, and mostly the money, to go to a spa and get pampered?  They claim to have great smelling, skin refreshers that will make you feel like a million bucks.  Honestly, in my 40+ years I have never been to a spa for a body scrub, nor a facial.  I know, you might be thinking that I am missing out, and perhaps I am.  However, I just haven't ever fit a spa day into my budget.(Now, I do like to budget for a massage a few times a year :)
  For the last 20 odd years, I have made a few scrubs that I know you will like.  I know this because they are fun to make, are inexpensive, and smell heavenly!  I like to ask my sister-in-law for baby food jars these days, as I no longer have them around.  I used to make them in pint jars, or recycled pickle jars, but then I learned that a smaller amount does better in the shower.
  A smaller amount means that you will have it in there for a shorter amount of time, thus not allowing as much shower water to come in contact with it.  It's best to try and not drip in the jar as you scoop it out, because your shower water can always add some unwanted organisms.
  I must share another tidbit with you regarding the sweet smelling scrubs.  About 5 years ago, I went to take my morning shower and there was a line of tiny black ants from the window all the way across the room and heading down into the shower.  I thought "what in the world are these buggers doing"?  Well, I hadn't capped my scrub, and they smelled it!  I couldn't believe it, but they smelled sugar.  So, keep it capped :)

  I don't have step by step pictures because I made enough last time to last another month or so.  But it is so easy, you can make it in a matter of minutes.  You will need:

  • a mixing bowl, sanitized jars, and I use chopsticks to stir
  • I eyeball it, but I will give the approximate measurements: to make 2 medium sized baby jars
  • 1/2 cup-ish of raw, organic turbinado sugar
  • 1 Tbl-ish Celtic sea salt
  • 2-3 Tbl Coconut oil
  • 1-2 Tbl EVOO
  • 1/2 tsp.-ish of vanilla extract ( I like to make my own with vanilla beans in vodka, just like a tincture)
  • 11-13 drops of Lavender essential oil
That's it!  You mix it well, put it into the jars and enjoy!  You get a marvelous exfoliation, and then a luxurious moisturizing.  Your skin feels sooooo soft and you smell like a warm cookie!  This is my favorite blend, but I also like citrus in the summer in which I substitute EVOO that I have infused with organic orange peels for 3-4 weeks (use it in place of the regular EVOO and the coconut oil, measure accordingly).
The jar on the left is body butter, that will be another post :)

  In the fall, I love to use the above recipe, minus the lavender, and substitute about 1/2 teaspoon of cinnamon powder.  (I tried it with cinnamon essential oil, but it was way too strong for me, even in small doses).

  **Now for the facial scrub, that is even easier**

I make 2-3 applications at a time, as I only do this twice a week.  I used it more often when I was younger, but with aging, comes finicky skin, so had to ease up a bit.  All you need is:
  • 2-3 Tbl baking soda
  • choose 4-6 drops of one of these:  Lavender for calming the skin or Ginger for addressing dark spots
  • Mix the soda and the oil of choice, scoop out about a TBl into your palm and add a small amount of water to make a paste, apply it to your damp skin, and gently rub.  You won't believe how smooth your skin will feel after!
Here is the link for my homemade toner http://newbeginningsglutenfreeherbal.blogspot.com/2013/07/sun-infused-all-natural-facial-skin.html
Please let me know if you have other favorite ways to pamper your skin!  Have fun!

Tuesday, June 18, 2013

Crunchy munchies? Gluten free, vegan fried chickpeas

  I was a vegetarian for 17 years, and once I was diagnosed with gluten intolerance,and gave up gluten, my body started craving weird stuff...like steak!  Well, after fighting that craving for a few months, I figured my body must be lacking something that my undiagnosed condition was keeping it from absorbing.  I fought with the idea, and decided to start listening, and give my body what it asked for (more on that subject on a later post).  One thing that I always crave, and have never been afraid to give my body is a crunchy snack.
  One of my favorite snacks in the world is potato chips.  Needless to say, you cannot eat chips and be any kind of healthy.  So, after eating my fill of kale chips and sweet potato chips, I tried to fry one of my favorite beans...Garbanzo beans otherwise known as chickpeas.  Man was I happy with the result!  I hope you'll give these a try, and let me know if you have any other crunchy snacks ideas!
I start the day before, by soaking organic, dried chickpeas/Garbanzo beans overnight

  1. You need to cook the next day (I used homemade vegetable stock)  for 3-4 hours.  Drain and let them cool.
  2. Once cool, let dry on several paper towels until no moisture is evident.
  3. Add salt, pepper, dried thyme, and oregano


Let dry on a stack of 2-3 towels, or use a clean dish towel.


4. Deep fry in a combination of Safflower and EVOO, or when I have it, I use Grape seed oil.


5.  It's important to use an oil that allows for high heat, as you need to fry these on medium high (between 7 and 8 on my stove).  They will brown and crisp up in 3-5 minutes.
While warm, toss with a splash of lemon juice, garlic powder, and  paprika.

They are so awesome and such a satisfying crunchy treat!  On this day, I enjoyed them on a bed of arugula, radishes, and micro mustard greens!


I have also made them in the same manner substituting cilantro, chili powder and lime juice.  I want to make one with thyme, lemon zest, and paprika as I saw on the gluten free homemaker.com
Let me know if you give it a try!  What other flavor combos would be nice?

Lemon Balm tincture treats depression, stress, and even fevers

  I grew up with a mom that had a green thumb.  She could grow anything, anywhere and at anytime.  I did not inherit that thumb.  After many years of failed houseplants, seedlings and gardens, I decided to consult the Farmer's Almanac before planting anything...it helped!  Things planted when the almanac says the conditions are good, seem to flourish more!
  Now, when it comes to any herb from the mint family, even the most challenged of growers can feel pride in that plant.  It will become bigger and stronger with every year as it spreads (sometimes it will even take over a spot).  My Lemon Balm has done just that.  I planted it 8 years ago, and now it is a huge bush that I regularly visit for it's therapeutic leaves.


This was taken in May, it is even bigger now!  We planted it near the deck so it will deter mosquitoes!


  It is just as easy to make the tincture as it is to grow the plant.  All you need to gather is:
  • a clean glass jar and lid (I boil mine to sanitize, but some say the dishwasher will do)
  • freshly picked Lemon Balm leaves ( you could make with dried leaves if you don't have a plant*see below)
  • vodka (since I am gluten intolerant, I have to use one that is not distilled from grain).
  • strainer and cheesecloth


  1. Place the leaves in your jar and muddle a bit to release the oils.  I fill them a little over 3/4 full because once they wilt, they sink.  *Remember from my tinctures with dried herbs, they SWELL*
  2. Fill to within an inch of the top with vodka, be sure the leaves are all the way submerged, or you risk spoilage.
  3. Label and date the jar and put on a shelf somewhere where you will remember to shake it every few days.
  4. After 5-7 weeks, you are ready to decant.


  I didn't have a cheesecloth this time, and you don't have to have one.  However, I ended up straining it 4 times to get the liquid more clear.


  Once the liquid is strained into another clean, glass jar, it is ready for use.  It is best to put some into a glass dropper bottle to have easy access.  I use 2-4 droppers full whenever I am feeling stressed, blue, or just out of sorts.  The tincture is also good to take when you have feverish colds, as is the tea made with fresh leaf infusion.  I don't like the taste of an infused teas, so instead, I add it to my orange or black  tea, and strain after 5 minutes.  


  The resulting liquid is so dark and beautiful!

Please give it a try and let me know how it goes.  Do you have any other tinctures that you enjoy using?  I would love to hear about it.


Monday, June 17, 2013

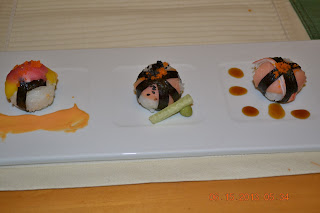
Making Sushi at home...great family fun

  One of the greatest pleasures in life, is good food that you can enjoy with your family.  Sushi is one of the meals that gets my entire family involved in the preparations as well as in the eating!  Since sushi is a creative process, it allows all of us to come up with variations in styles as well as ingredient combos.
  We have made sushi rolls at home ever since the boys were very young.  Our older son started eating California  Rolls when he was only 18 months old, because he was always wanting to try what the adults were eating. Once he had sushi, he was hooked!  Our youngest also started when California Rolls by Kindergarten.  After a few years, they started to love tempura rolls of all kinds, and Unagi (Eel) the most.  Once they were in middle school, we allowed them to try raw sushi...once they did, they were hooked!
  Our boys love You Tube, and after finding a few videos suggesting different sushi making, we knew we had to give it a try. Here are the links that we got inspired from: http://makesushi.org/   and  http://www.youtube.com/watch?v=naYZTmgPDic
 Over the weekend we tried these new methods, and now we have several new items to add to our sushi making nights.  The boys were so creative, and they definitely have great culinary skills like their Daddy!
Have you ever made sushi at home?  I would love to hear about it, please leave a comment.


Friday, June 14, 2013

Homemade herbal vitamin tincture for children

  I really enjoy making herbal tinctures for specific requirements.  For example, I make a dandelion tincture to strengthen and detox the liver, and take it for a few weeks at the change of each season.  We could all use a little detox when going into a different phase of nature's year.
  I used to make my kid's tinctures by using apple cider vinegar, but they never wanted to take them because of the taste.  Once I started making them with glycerin however, they didn't have a problem because it is soooo sweet.
  Now, I am one who loves to save money; yes, I am quite frugal, and always have been.  In today's world, not only do we need to save money, but we also need to learn to return to the old ways of self-sufficiency!  As I mentioned in an earlier post, I have been making topical, herbal creations for over 20 years.  I only started ingesting them about 10 years ago, after I studied the various herbs and learned what I hoped they could do for me and my family.
  I focused on making one herb at a time, until I read WellnessMama, and she suggested the multi-vitamin.  Here is my interpretation on her suggestions.  I hope you will research what herbs you may want to use, or feel free to give mine a try.  Let me know if you do, I would love to hear about it.  (remember, I am not a doctor, so take care and investigate each herb for your own health before you use it).


I love @mountainroseherbs for organic ingredients, unless of course you have your own home gown herbs

  I always boil my glass jars, using Ball mason jars usually.  This time I used a pickle jar.  Some say you can simply run them through your dishwasher to sanitize, so do whatever you feel comfortable with.


              Multi-vitamin glycerin tincture for children (or those who prefer not to use alcohol).
  

Fill the jar using the following dried herbs

1/4 cup alfalfa leaf
1/4 cup dandelion leaf
1/4 cup raspberry leaf
1 Tbl. burdock root
2 Tbl. catnip leaf and flower
2 Tbl. oatstraw
1/2 Tbl. rosehips

1 cup boiling water
2/3 cup glycerin, food grade

  1. scoop all the herbs in the jar
  2. add the boiling water and let steep 3-5 minutes
  3. add the glycerin
  4. cap tightly, label and store
  5. make sure all herbs are submerged and shake every few days for 4-6 weeks

I enjoy this process so much, that I make smaller batches like this every few months.  You can of course double or triple this to make a larger batch.  You can follow the heating method for glycerin tinctures if you don't want to wait the 4-6 weeks.  I prefer this old-fashioned way of letting the herbs release slowly.  Put them somewhere that you will remember to shake every few days.  
when it's time to decant, use a cheesecloth to strain into a new, sanitized jar

  I usually have enough cheesecloth to triple filter, and cover the whole strainer.  This picture is of the straining of my adult multi when I was low on cheesecloth.  (I forgot to take a picture of the kids vit process).

  I recommend 1-2 droppers full from a glass dropper bottle once or twice daily for the benefits of vitamins A, B, C, E, K, magnesium, calcium and iron.  The oatstraw is an excellent source of calcium.  I omit it from my adult vitamin because of the possibility of gluten.  *see my post on adult vitamins to read up on the properties of these particular herbs*


What tinctures do you enjoy making?  Here is the link to making vitamins for adults.  Have a blessed day!


Joanna


Thursday, June 13, 2013

Gluten free, dairy free "shortbread cookie" with homemade strawberry sauce

 Have you ever gone into gluten free baking thinking that you can change a regular recipe by simply substituting gluten free ingredients?  Well, I have done that a lot since my diagnosis.  I love my baked goods and I want to continue enjoying them.  I have found a lot of great websites that feature gluten free recipes, and I have enjoyed recreating a few.  I wanted to try the "chemistry" on my own, and adapt a regular recipe.
  Well...it was supposed to be Bon Appetit's sweet biscuits ( I desperately want a fluffy, Southern biscuit that's g-free, but no such luck yet).  I subbed my own g-free idea, and it didn't turn out at all like a biscuit!  HOWEVER, I discovered a wonderful type of  "shortbread" or "tea cookie".  Not sure what you'd really call it, but it's a slightly sweet, very soft cookie that was really good!  I hope you like it!  Let me know if you try it.
baking fail that turned into a new treat!
  Adapted from Bon Appetit June 2013 magazine:

1/2 cup organic cane sugar
1 tsp. baking powder
1/2 tsp. kosher salt
1 1/8 cup of my all purpose gluten free blend *(recipe below, but you could probably use any blend)
1/2 stick Earth Balance butter,cut in cubes (you can probably sub regular butter if you wanted)
a scant tsp of grated lime zest
a scant 1/2 cup buttermilk( I used So delicious coconut milk and added 1/4 tsp. of apple cider vinegar, let rest for 5 minutes instead of using real buttermilk as to keep it dairy free)
1 egg, beaten
1 Tbl. raw sugar

*(my gluten free baking mix...if you use this, just measure out the 1 1/8 cups
1/2 cup Besan (chickpea flour)
1/2 cup Brown rice
1 cup Tapioca starch
1/2 cup Arrowroot)
this shows how much it spread, so I knew it wasn't gonna be a biscuit...lol

  1. preheat oven to 400 degrees
  2. whisk together, sugar, baking powder, salt, flour in a large mixing bowl
  3. add chilled butter and lime zest and blend with fingers or a fork
  4. add buttermilk and mix just until combined
  5. place in drops on a Silpat or parchment lined cookie sheet
  6. sprinkle with coarse raw sugar
  7. bake 10-12 minutes or until golden on edges
they look like sugar cookies, but they are less sweet and the lime adds a kick

I suggest topping each with strawberry jam, or make your own sauce like I did if you have fresh strawberries on hand:

  1. about 2 1/2-3 cups hulled strawberries 
  2. 1/4 cup organic cane sugar
  3. tsp. finely grated lime zest
  4. 2 tbsp lime juice


  • cook strawberries and sugar over medium high heat, stirring occasionally, until thickens like jam.12-15 minutes. 
  •  stir in lime juice and zest  
    it smells so good as it cooks!


     Since the "shortbread cookies" were supposed to be biscuits that you top with jam, I decided to top these anyway.  They turned out quite yummy!


    Do you have any fail to victory stories in gluten free baking?  I'd love to hear them!


Wednesday, June 12, 2013

Herbal tincture for homemade multi-vitamins

 Welcome to the first of my posts on herbal creations.  I have always enjoyed searching the web for ideas and methods that others use.  I usually get the multiple ideas swirling around in my head, then I use my many books and decide what I want to create.
 I sometimes make things differently if I am in a different mood, or if for instance, I am out of an ingredient ;) I used to not measure anything, but as I made this latest tincture, I decided to measure so that I could share with you.
 I hope you will enjoy my recipe, and also do your own research to double check that the ingredients are right for you.  I am not a professional, so these are only recipes that have worked for me and for my family.  I encourage you to learn about the different types of herbs and essential oils available and which ones may best serve you. One of my favorite books is The Complete Medicinal Herbal by Penelope Ody, I bought mine in 1994, but I'm sure you can still find it.
 Most of my tinctures have always been specific to treatment; like dandelion for liver strengthening, and chamomile for skin salves. I had dozens of different ones, and never thought to put them all together...duh.  I got the idea for making a multi-vitamin from +Katie Wellness Mama  and I adapted her vitamin recipe to make my own.  Have fun!


Start with 2 quart jars and add the following dried herbs:
1/2 cup raspberry leaf
3/4 cup alfalfa leaf
1/4 catnip
1/4 dandelion
3 TBL burdock root
3 TBL Rosehips
1 1/2 cups boiling water
1-2 cups vodka (I use Chopin or Ciroc because they are gluten free.  There are less expensive vodkas available, but without naming them, I will tell you that I had reactions to them)

Here is why I choose these particular herbs:

  • Raspberry Leaf- Since my husband takes this too, raspberry is known as a prostrate tonic.  For both of us, it is a cleansing herb ***use caution if you may be pregnant as it is a uterine stimulant


  • Alfalfa Leaf- contains vitamins A,B,D,E and K.  It is a source of iron, calcium and magnesium as well as protein.  In Arabic it means "father of all foods".  I have made tinctures before where I doubled the alfalfa, and I probably will do that every other time.

  • Catnip- contains calcium, iron and several vitamins too.  It is also calming and soothing (unless you put catnip on your cat's scratching post, then it seems to be a stimulant)!

  • Dandelion- mainly it is a great liver tonic, and diuretic.  The leaves are high in potassium too.  (When the seasons change, I take a tincture of dandelion root, flower and leaf, as I feel it helps clean my system and prepare it for the seasonal changes).

  • Burdock Root-eliminates built up toxins, and is antibiotic in nature, the leaves can be used as a stomach soother.

  • Rosehips-high in vitamin C and is a blood tonic
**you can substitute or add other herbs like *lemon balm for depression and tension, or lavender flowers for nervous exhaustion.  Always use a good quality herb, or grown and dry your own.  If I don't have it in my garden, I order from +Mountain Rose Herbs 

There are numerous methods for making an alcohol tincture, this is the one that I have had the most success with:
  1. put all the dry herbs into a large mixing bowl and mix well.
  2. equally divide the herbs into 2 clean glass jars ( I always boil them first, but Ive read that the dishwasher is sufficient when you will be using alcohol in the tincture)
  3. put 3/4 cup of boiling water into each jar and let the herbs steep for 2-3 minutes
  4. fill the jars the rest of the way with vodka, leave a little space at the top(at lease an inch or 2) because as you can see in my picture, after a few days they swell so much!
    this is after 3 days...the herbs swell a lot, so leave space 
  5. cap tightly and put away somewhere where you will remember to check on it and shake it every few days
  6. After 4-5 weeks, you are ready to decant the tincture.  I like to strain mine by using a cheesecloth into 1 quart jar.  (the 2 quarts will fit into one once the herbs are out)
    I usually have enough for the cheesecloth to completely cover the strainer, but was running low
  7. Compost the herbs, or I've read where some made a quick tea infusion with them, but I haven't tried that yet.
  8. I always double or triple strain through the cheesecloth because I don't like to see the sediment that is left behind.  Of course, you will have some as to be expected, and it won't hurt you to take it if you want to skip the extra straining :)
  9. I like to put some of the tincture into a glass dropper bottle for ease of administering.  Then it is easy to get your funnel and re-fill as needed, and you can travel with it.  It varies how much to take, we usually take 2 droppers full diluted into about 1/4 cup warm water twice a day.  You don't have to dilute it, but I think the alcohol can be a little strong.  I make the tincture without alcohol, and use sweet glycerin for my boys.  That will be posted later...
    It looks so rich and chock full of goodness!

Thanks again for visiting and please let me know if you try this, or if you have your own ideas I would love to hear about them!  I am just getting started pulling my recipes and experiments out of the notebooks that Ive kept through the years.  I will be posted pictures with each step the next time that I make any new tinctures.  There is an awesome video on +Mountain Rose Herbs.
Here is the link for how to make a version for children.  Have a blessed day!  Joanna

http://newbeginningsglutenfreeherbal.blogspot.com/2013/06/homemade-herbal-vitamin-tincture-for.html


 Welcome to my blog about two of my favorite subjects: gluten free delicious foods, and homemade herbal recipes.  I have been making herbal concoctions for over 20 years, and would love to share them with you! I make everything from personal pampering products to tinctures that treat any illnesses my family may encounter. It is relaxing, fun, intuitive and also a natural, money saving way to keep your home and family happy.
  I have always loved food, and after marrying a chef I became quite the foodie.  We raised our boys with good food, and as teenagers, they are foodies as well. After being diagnosed with gluten intolerance almost a year ago, I have been trying to recreate some of our family favorites.  
 I have had many gluten free baking projects that ending up straight in the trash, but I have also had my share of ones that made me feel like I was no longer deprived of the good stuff!  (Don't worry, I will only focus on the ones that turned out well)!
 As you experiment in the kitchen with herbs, spices and gluten free flour options, you get a feel for what you want to accomplish.  Sometimes it doesn't go as you planned, but you tweak it, and play with it until you are satisfied.  I hope I can share some ideas that you can take along with you and enjoy in your home. Thanks for visiting!  Joanna